Home / News & Blog / Abrasive Blog / Quality Standards and Corresponding Testing Methods for Abrasive Grains
Grinding processes rely on abrasive grains to achieve high surface quality, precise dimensional tolerances, and process stability. As one of the most critical machining operations, grinding serves as both a finishing method for hard-to-machine materials and a shaping technique for various applications.
During grinding, the grinding tool is a key element alongside cooling lubricants and grinding machines. The tool’s structure, chemical composition, surface morphology, and wear behavior significantly influence workpiece quality, surface integrity, process stability, and productivity. Grinding tools come in various forms, including solid wheels, tools with grinding layers, or coated tools like belts, pads, or discs.
Abrasive grains are the primary agents of material removal during grinding, embedded within a bonding matrix. The bond hardness determines the tool’s hardness and influences its wear behavior.
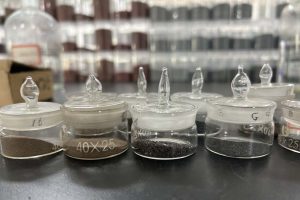
The primary function of abrasive grains is to remove material by forming chips in ductile materials or causing surface fracturing and pressure softening in brittle materials. To achieve this, abrasive grains must be harder than the workpiece material to facilitate chip formation. Ideally, abrasive grains should undergo self-sharpening through fracturing under excessive grinding forces. When grains become dull, the bonding agent can also release the grains to enable self-sharpening.
The four primary characteristics of abrasive grains that determine cutting efficiency are hardness, heat resistance, toughness, and friability. Beyond these performance-based parameters, the size and shape/morphology of the grains determine the number of effective cutting edges during the grinding process. Additionally, chemical, thermal, electrical, and magnetic properties are crucial in tool manufacturing.
All these abrasive grain characteristics exist as distributions within a batch of abrasives. Bulk density and uniformity are also critical factors. Balancing all these properties is essential to ensure optimal performance in both tool application and tool manufacturing.
Selection and Analysis Methods of Abrasive Particles
The selection and analysis methods of abrasive particles can be described through various factors: precision, accuracy, resolution, and repeatability.
Sieve Analysis
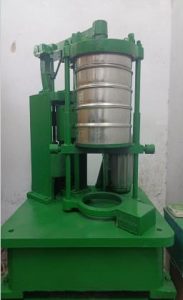
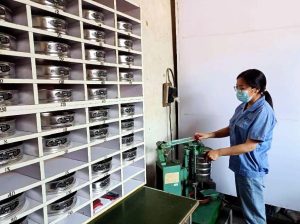
Proper control of abrasive particle size distribution requires suppliers to provide materials according to national standards. Upon arrival at the factory, the material should be inspected according to the particle size grade. Each time, a single particle size is analyzed, such as 24#, 30#, 36#, etc. For each screening, one particle size grade is used, employing a vibrating sieve with five sieves selected based on the national abrasive standards. The sieves should be arranged with the coarser mesh at the bottom and the finer mesh at the top. There should be a collection tray at the bottom and a cover on top.
To conduct the analysis, weigh 100g of the abrasive material corresponding to the particle size to be measured and pour it into the top sieve. Cover it, place it on the vibrating sieve, and start the equipment. The vibration should last for 5 minutes.
After the vibration is complete, remove the sieves and weigh the material in each sieve layer. Record the sieve mesh number and the weight of each layer, which will represent the particle size distribution values of the abrasive. Finally, compare the results with the national standards for abrasives to determine whether the material meets the national standards.
Sedimentation Method
The sedimentation method, or Stokes’ law, uses a still medium and freely falling particles. This method is generally used for grading finer particles. Stokes’ law relates the settling velocity of spherical particles to the radius of the sphere, the particle density, the medium’s density, and viscosity. Since Stokes’ law is most effective for spheres, flat particles experience more resistance per unit mass, and the sedimentation process may result in oversized particles. This could be a problem in grinding or polishing operations, affecting the surface quality of parts. Additionally, the sedimentation method can be very time-consuming (for very fine particles, the process can take over 24 hours).
Laser Particle Measurement
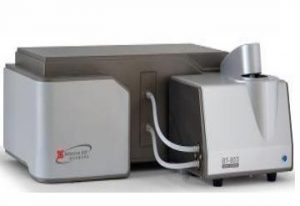
Laser particle measurement is a counting method where a mixture of particles flows through a ring in a fluid medium. A laser beam passes through the ring and creates a shadow effect based on the size of the particles. Other size measurement methods include laser light scattering, dynamic light scattering, photon correlation spectroscopy, Brownian motion turbidity, and more.
Image Analysis
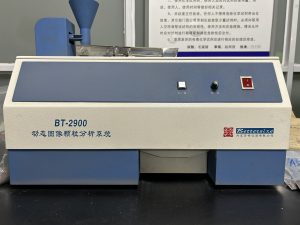
Image analysis involves 2D projection analysis of abrasive particles, such as through backlight microscopes, film scanners, or scanning electron microscope (SEM) images. It should be noted that the placement and orientation of particles can interfere with measurement results. For instance, some particle shapes are more likely to rest on certain particle planes. Common image analysis indicators include maximum and minimum particle diameters, particle perimeter, and the cross-sectional area of particles in the projection plane. Particle analyzers can be used in conjunction with sorting equipment.
Shape Sorting
Shape sorting machinery operates based on the differing movement of particles of different shapes on an inclined, vibrating surface. A box on one side of the table collects different shapes. Round shapes, like cubic octahedra, roll downward, while irregular shapes like needle-like or flaky crystals may move upward. Shape sorting is only suitable for batches of particles within the same size range.
Bulk Density Measurement Method
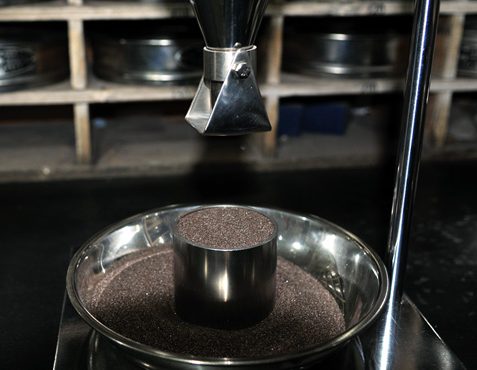
Bulk density can be determined by measuring the weight of particles packed into a known volume of a cylinder, where the particles fall through a funnel from a fixed height.
Using a bulk density tester, position the tray at the center, and pre-weigh the container, recording the weight as m1. Position the container correctly and seal the discharge opening. Then, pour approximately 500g of the abrasive to be tested into the measuring hopper. Open the discharge opening and allow the abrasive to fall freely into the container below. Use a steel ruler to scrape off any excess abrasive, and weigh both the abrasive and the container together, recording the weight as m2.
Bulk density = (m2-m1)/199 g/cm³
The bulk density significantly affects the density of the finished product during molding. The bulk density of the abrasive is a critical indicator.
Impact Strength Testing
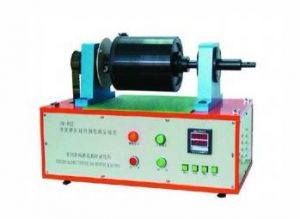
Toughness value is an important indicator for abrasives and a key parameter for industrial-grade grinding wheels. The toughness value directly impacts the quality of the grinding wheel. The toughness value is measured one grit size at a time.
Weigh 250g of the abrasive for the grit size to be tested, and perform sieving according to the particle size distribution method, using two sieves, a tray, and a cover. Place the sieves on a vibrating screen and shake for 5 minutes. After shaking, remove the sieves and weigh 100g of the abrasive from the sieve layer of the grit size to be tested. Place this abrasive into the ball mill toughness tester’s drum, adding 31 steel balls, and tighten the seal. Place the drum on the instrument, cover with a protective shield, turn on the power, and set the rotation speed to zero. Set the speed to 1200 revolutions per minute (rpm) and start the equipment, allowing it to run automatically. Once the 1200 rpm is reached, the machine will stop automatically.
When the device stops, remove the protective shield and the drum, open the seal, and sequentially remove the steel balls, placing them into a box. Set up the tray and sieve with the grit size to be tested, and pour all the drum abrasives into the sieve. Return the drum to its position. Place the cover on the sieve, secure it tightly, and put it on the vibrating screen for 5 minutes of vibration. The time must be precise—not more, not less.
After the vibration, remove the sieve, and weigh the remaining abrasive in the sieve. This weight is the toughness value of the abrasive. Once the testing is completed, clean up the sieves and equipment, restoring everything to its original state.
Single-Particle Compressive Strength

This measures the maximum force required to break a particle along one axis. A single particle is placed between two anvils, and the maximum breaking force is measured and divided by the particle area to define the fracture strength.
Magnetic Sorting
Magnetic sorting is performed by bringing the particles close to a drum or belt with a magnetic force stronger than the particle’s gravity. Magnetic sorting is used to separate magnetic and non-magnetic particles or to separate abrasive particles from metal chips in sandblasting processes.
Magnetic Susceptibility Analysis
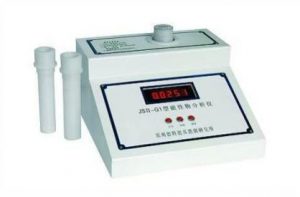
Magnetic susceptibility analysis is performed on a defined sample size using a standardized magnetic analyzer. The imbalance between an electrically excited reference coil and the sample coil is converted into the relative magnetic content of the sample.
Electrostatic Separator
Particles with conductive surfaces can be selected using an electrostatic separator. An electrostatic field can be established between two flat plate electrodes.
Summary
The quality of abrasives directly impacts the machining results and cost control in industrial production. By strictly adhering to industry quality standards and using scientific testing methods, we can ensure that the abrasives’ performance meets the actual application requirements. From particle size distribution to heat resistance, every detail needs accurate testing and validation.
Looking ahead, with the continuous advancement of testing technologies, abrasive quality management will become even more precise, providing better material support for industrial production.